It’s about time I put out my Sunfounder Pironman 5 review, as it’s been on a shelf here for a while, coming out intermittently to test out the 16GB Raspberry Pi 5 that it holds captive within.
I won’t be doing a full Raspberry Pi review of the 16GB model, though this will be as close as we get, as I stress it with some new tests and see if the Pironman 5 has what it takes to keep things under control.
I also won’t be doing any Iron Man references because I’ve never watched it, it’s never been my thing, and I fully expect to be destroyed for admitting this.
Table of Contents
What’s in the Box?
The Pironman 5 comes with everything you need to get up and running:
- Main case components (top, bottom, sides)
- 2x RGB 40mm case fans
- 1x 40mm CPU fan
- Mini OLED display
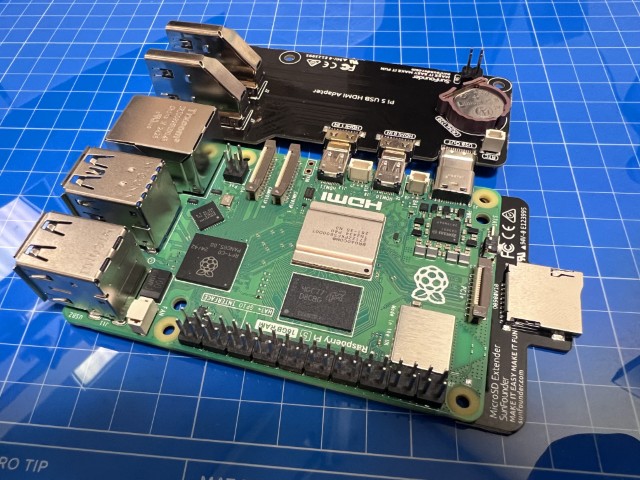
- Various daughterboards (for M.2, power buttons, GPIO extensions etc)
- Required screws, standoffs and cables
- Sturdy power button
- Most importantly, the assembly instructions
Assembling the Pironman 5
Straight off the bat, I should mention that putting this thing together takes some time. The assembly process isn’t particularly difficult, but there are many small parts and steps involved, so pay attention and if you’re unsure, go back and double-check! One of the first steps requires standoffs of different sizes and it’s easy to get mixed up.
One thing that stood out towards the end of the assembly process was the fan cables. Depending on the orientation and your patience/skill level, you may find it’s a bit fiddly to keep them neat and out of the way of moving parts. Also, the screws for the RGB fans on the back aren’t the greatest, so be careful not to strip them. A few of mine just spin forever now as you turn a screwdriver, though they don’t feel loose.

I think all in all, the build took me around 45 minutes, which seems to be about on par with what I saw from others’ attempts. Given there are multiple daughter boards that need to be lined up and secured in place, along with a rather large amount of srews, I’m proud of myself.
Design & Build Quality
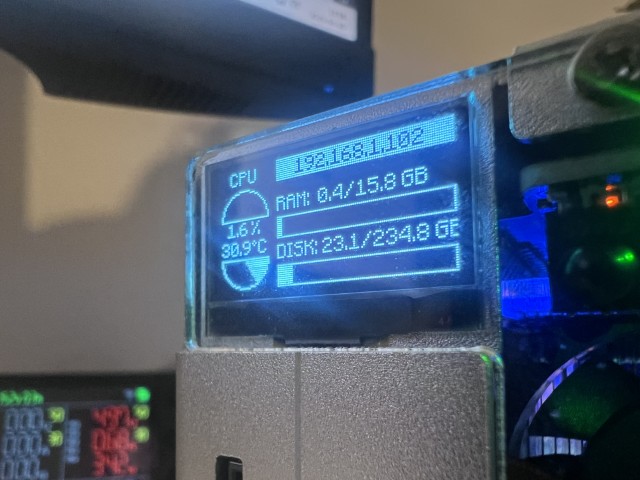
When fully assembled, the Pironman 5 looks pretty slick. The panels go together well, everything feels of high quality, and the screen is a great touch, with key information available at a glance (though additional software is required, more on that later).
The power button feels sturdy and is easily accessible on the front of the Pironman 5, along with the microSD card slot (which is extended via one of the aforementioned daughter boards), so no digging around at the back to struggle with the microSD card if you’re that way inclined. It’s also a spring-loaded slot, and I love it.
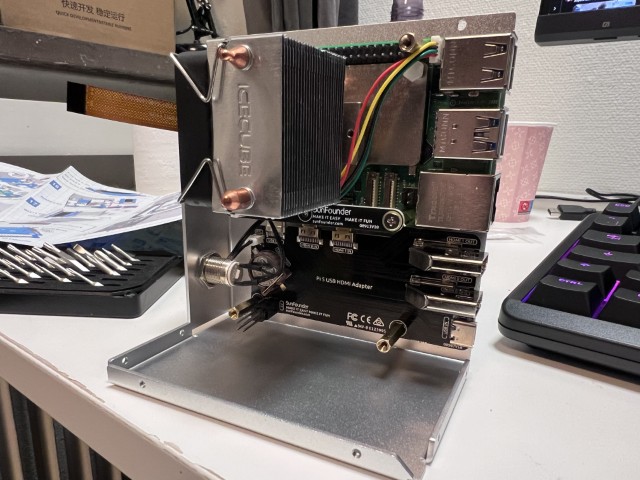
The decision to break out the micro HDMI ports to full-size HDMI on the back (along with a re-routed USB-C power connection) is a cracker and greatly appreciated, though the board that handles that does feel a little unnerving at times. If you’re plugging a cable in and leaving it as is, then you’ll likely forget about it and have no issues.

The one breakout/re-routing that I’m a little less fond of is the GPIO header, which is accessible via a cutout in the acrylic side panel. Honestly, though, I’m not sure what else they could have done with that. You’re already utilising the PCIe FPC cable for the M.2 device, and there wouldn’t be space inside to handle a HAT if they did it any other way. If you’re looking to use a HAT, then this case is unlikely to be for you, though you likely already knew that.
Finally, it’s worth noting that if you ever want to take your Pi out of this case later, you’re in for what I’d generously call “a fun time.” This isn’t a case designed for frequent disassembly, so if you only have a single Pi that you bounce between projects, bear that in mind.
Performance Testing
Testing time, and for all of this, I’m using a 16GB Raspberry Pi 5 with the performance governor enabled across all tests. I’m running the 2 case fans at 100% during benchmark tests (though normally, the RGB case fans only kick in at 60°C with the defaults in their software), and the CPU fan is being controlled by Raspberry Pi OS’ defaults. No thermal throttling was observed throughout any of the tests. The ambient temperature was 24 degrees Celsius.
Power delivery to the Pironman 5 and power monitoring were handled by the HardKernel SmartPower 3.
For the test suite, I’m throwing in a couple of newcomers. For continuity, I’ll be continuing with stress-ng, but I’m also debuting an Ollama/LLM test, which will be on CPU only and torture its way through DeepSeek R1’s 1.5b, 8b, and 14b offerings. Finally, we have Linpack. Jeff includes this in his test suite, and I thought it would be great to run through that in each of my tests too, to build up a decent amount of data for comparison!
Temperatures
Here’s how the Pironman 5 handled my standard stress test (stress-ng --cpu 0 --matrix 0):
| Conditions | Temperature (°C) |
|---|---|
| Idle | 32.9 |
| Full Load | 53.5 |
These are solid numbers, though somewhat expected with the active cooling on offer being very similar to the 52Pi ICE Tower I reviewed previously. At idle, the CPU fan doesn’t spin, though the 2 rear fans were pulling air out to get any hot air away from the heatsink.
Power Consumption
Again with the stress-ng test (which isn’t necessarily a test to get the maximum power draw possible, it’s just hitting the CPU at 100%), under full load, we see a power draw of around 7.8w, and at idle we see a respectable idle draw of around 4 Watts, which would be lower still with the 2 back fans turned off.
| Conditions | Power Draw (Watts) |
|---|---|
| Idle | 4.2 |
| Full Load | 8.3 |
When compared to the values seen in my initial Raspberry Pi 5 review, we can see that the cut-down SoC on the 16GB variant (also found on the 2GB Pi 5, and the CM5) has some decent improvements, allowing us to idle at around the same levels with a screen and 2 fans.
As a side note, it takes a while for the Pironman 5’s CPU fan to kick in as the cooling does a great job at keeping things under control. The above load value is with the fan running, but before that ramping up, you’ll be sitting at around 8w. If you’re only hitting the CPU for short periods, that’s closer to what you’ll see on average.
Linpack Performance
On to Linpack now to measure raw compute performance:
| Metric | Value |
|---|---|
| Gigaflops | 31.807 |
| Gigaflops per Watt | 3.132 |
| Gigaflops per Dollar* | 0.167 |
*Based on the total cost of a Pi 5 16GB ($120) + Pironman 5 case ($80). Divide the Gigaflops value by 120 if you’re only interested in the Pi 5 itself.
During the test. 9.9w was the highest recorded power draw, and the ICECUBE cooler kept everything in check.
Ollama Testing
I figured with 16GB of RAM, this might be a decent little LLM runner, so I tested some DeepSeek models:
| Model | Tokens/sec | Tokens/W | Tokens/$* | Peak Draw (Watts) |
|---|---|---|---|---|
| DeepSeek R1 1.5b | 9.77 | 1.017 | 0.051 | 9.6 |
| DeepSeek R1 8b | 2.09 | 0.213 | 0.011 | 9.8 |
| DeepSeek R1 14b | 1.26 | 0.128 | 0.006 | 9.8 |
*Based on the total cost of a Pi 5 16GB ($120) + Pironman 5 case ($80). Divide the Tokens/sec value by 120 if you’re only interested in the Pi 5 itself.
The 1.5b model runs decent-ish on this setup, but as expected, the larger models struggle a lot. Still, it’s nice to have the option to run these models locally if you really hate yourself, and the cooling performance means you can run them for extended periods which is great, because any meaningful work on them will indeed take a long time.
Other Notes
Whilst I don’t have a dedicated section for storage testing, my tests at Gen 3 speeds on the included M.2 carrier board were perfectly fine, hitting the maximum possible speed and being perfectly stable across multiple disk-intensive tests.
WiFi signal was a worry, as you’re locking your Pi away in a mostly aluminium box, and the lack of an external antenna really hampers things. If you’re looking to grab a Pironman and you don’t have a wired connection available nearby, do make sure that it’s placed close to the router. It’s not unusable whilst further away, it’s just a little spotty and times and speed does suffer.
If you’re looking to connect a camera, you’re going to find it a little fiddly to route cables out of the case, but realistically, I don’t see this being the case that people want to throw cameras on top of.
Pironman Software
Sunfounder provides software to control the case’s features, which you can find at their documentation site. Installation is straightforward with a few lines pasted from their instructions, and after a reboot, you end up with a working 0.96″ OLED display showing the CPU utilisation and temperature, the Pi’s local IP address, RAM utilisation, and disk utilisation of the boot drive.

The software gives you control over the Pironman’s RGB lighting, fan behaviour, and screen display options. By default, the RGB case fans only activate when the temperature hits 60°C, which is a nice power-saving feature, and a bonus if you want things to be quiet at idle, as the fans are definitely audible if you’re close to your Pironman.
For those curious, the monitoring software that’s in place uses around 2-3% of the CPU whilst running.
The Pironman 5 Good & The Not-So-Good
Good
- Aesthetic is nice – it looks cool on a desk
- Power button feels solid and satisfying
- Included screen is a nice touch with useful system info
- Effective cooling performance
- RGB fans look nice (if that’s your thing)
Not-So-Good
- Takes quite a while to put together
- Getting the Pi out later is challenging
- Fan cables need a bit of poking to stay tidy
- Fan screws for the RGB fans could be better quality
- Price is on the higher end for Pi 5 cases
I should note that these Not-So-Good notes are quite nitpicky. The price is more reasonable when you factor in all of the individual components, but you have to want all of those for the Pironman 5 to be good value at that point.
Where can I buy it, and how much is it?
We’ve mentioned its value a couple of times, but the official RRP for the Pironman 5 is $79.99 USD. It’s available via the official Sunfounder storefronts on Amazon, though the price seems to be a little higher, likely as it will include sales tax in countries where it’s included by default, and to help cover any fees.
If you want to purchase directly from Sunfounder, you can grab it from their official store, where you can also add options like NVMe drives, Raspberry Pi AI modules, power supplies, and Raspberry Pi cameras. Oh, you can even throw in a Pi 5 at the same time if you like.
Conclusion
The Sunfounder Pironman 5 is definitely more on the premium end of Raspberry Pi 5 cases, but it backs up that premium price with a solid feature set. The cooling performance is great, the build quality is generally high, and the added OLED screen is genuinely useful.
Whether it’s worth the price depends on what you want. If you’re after maximum cooling performance per dollar, there are cheaper options. If you want a case that looks cool on your desk, has nice features like a power button and screen, and keeps your Pi 5 running at comfortable temperatures, the Pironman 5 delivers just that.
For me, despite a few minor quibbles with assembly and cable management, I like what Sunfounder has put together here. It’s a solid option if you’re looking for a feature-packed case for your Pi 5, and I’ll likely be leaving this 16GB Pi 5 in here for the foreseeable. That, however, may be equal parts of not wanting to pull it apart, and the fact that it does a good job.
TL;DR: It’s a great overall package for the price, be patient during assembly, and enjoy the cooling performance. Oh, and I’ve never watched Iron Man.
2 comments
The limited wifi range should be included in the not-so-good list
Disappointed that it doesn’t work with UmbrelOS.