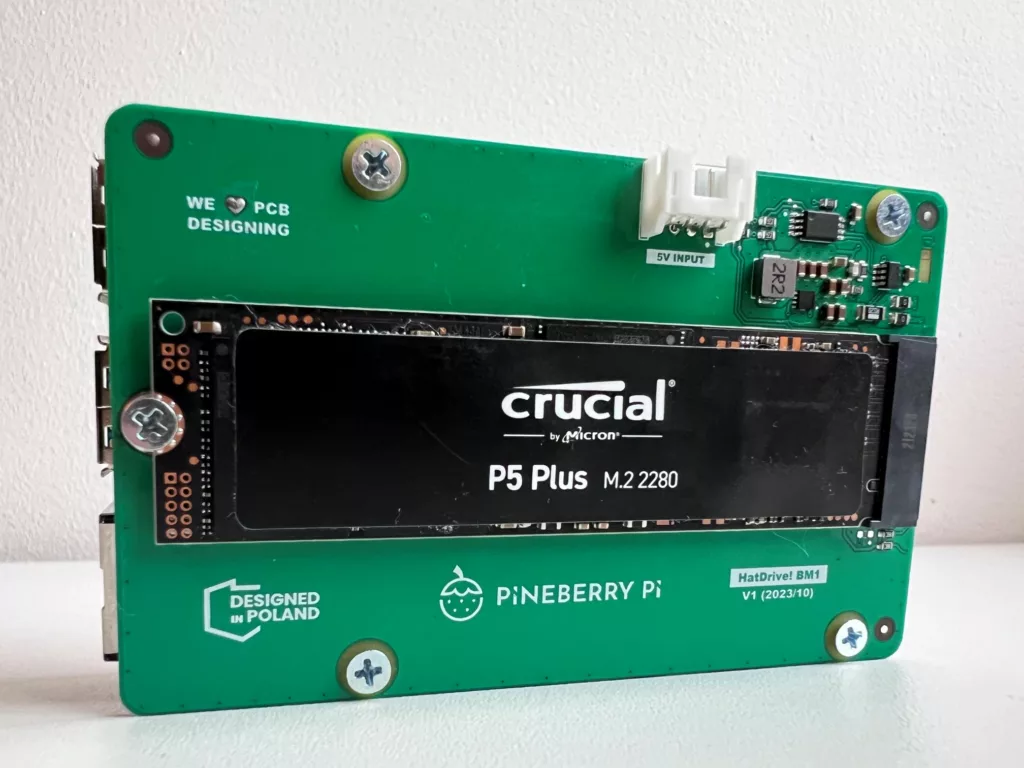
Want to make the most of the PCIe port available on your Raspberry Pi 5 and boot from an M.2 NVMe SSD? You’re in luck! A whole host of Raspberry Pi 5 NVMe hats are available these days and whichever you go for (in theory) will allow you to boot your Pi directly from the NVMe without requiring a microSD card, or USB!
For this guide, I’ll be using the Pineberry Pi HatDrive Bottom but it’s by no means Pi Hat specific, so yours will work in just the same way.
Table of Contents
Step 1: Prepare your NVMe SSD
As with my Raspberry Pi 5 USB Boot guide, the quickest and easiest way to get a Raspberry Pi image onto your disk is going to be to use the Raspberry Pi Imager. You can either do this by connecting it to another computer (I use this UGREEN USB NVMe M.2 adapter) or by installing it into your Raspberry Pi, but booting from either microSD or USB first. From there, you can use Raspberry Pi Imager to install to the NVMe drive.
Using their own Imager software means you’ll be able to configure your hostname, SSH preferences, usernames, passwords, WiFi connection details, etc at the time of writing and they’ll all be copied across and enabled for use on first boot!
Step 2: Enable the PCI Express port
Firstly, you’ll want to check if your specific Raspberry Pi 5 NVMe hat is HAT+ compliant as if it is, you don’t need to worry about enabling the PCIe port via the config.txt file but if you’re not sure, or you know it isn’t, follow the steps below to begin your Pi 5 NVMe boot adventure!
Add the following lines to your /boot/firmware/config.txt file:
dtparam=pciex1
dtparam=pciex1_gen=3
The 2nd line there with gen=3 will force the port to PCIe Gen 3 speeds rather than the default PCIe Gen 2, which gives a theoretical doubling of the throughput from 500MB/s (Gen 2) to 1GB/s (Gen 3) but in the real world, it’s more likely that you’ll see speeds go from around 450MB/s on Gen 2 to 850MB/s on Gen 3. At least that’s what I’ve seen on my Pineberry Pi and Pimoroni test boards and various disks!
I should note though that the port is only rated for Gen 2 speeds, so running at Gen 3 may come with some stability issues. If you’re experiencing weirdness at Gen 3, do drop it back down to Gen 2 by commenting that line out and seeing if it helps.
NOTE: This should be done in the /boot/firmware/config.txt file of your Raspberry Pi OS installation, so if you’ve flashed Raspberry Pi OS to the NVMe drive already, you need to open and edit that folder from another device, most likely the one that you flashed the image on for ease! If you’re doing this from a separate install booted from microSD or USB, don’t do it on that install’s config.txt file.
NOTE 2: A recent bootloader/eeprom update from February 5th is supposed to stop the need for enabling the PCIe port explicitly (see the Updating the Raspberry Pi bootloader/eeprom section at the bottom on how to do that, though changing the boot order is still required. Speaking of which..
Step 3: Change the boot order
Now we’ve enabled the PCI Express port on the Pi 5, we need to tell it that we want to boot from there specifically.
You’ll need to be booted from something for this, so hopefully you have a microSD card or USB device around to boot from for now, but once you are, we’ll use the rpi-eeprom-config to update the boot order to check for the NVMe device first. Open the editor with:
sudo rpi-eeprom-config –editLook for the BOOT_ORDER line and update it to read:
BOOT_ORDER=0xf416You can also add PCIE_PROBE=1 on a new line if you wish, though this is not necessary on the February 5th 2024 bootloader/eeprom.
Step 4: Raspberry Pi 5 NVMe Boot time!
You should now have an M.2 NVMe SSD flashed with the latest version of Raspberry Pi OS, along with the configuration changes needed to boot from the NVMe drive. At this point, disconnect any other boot devices (microSD/USB) that you may have used to perform the above steps so that only the NVMe remains.

Double-check that everything is connected properly (I’m looking at you, flexible cable between the NVMe Hat and Pi 5..) and connect the power to your Raspberry Pi 5. With any luck, your Pi will put on its Sonic the Hedgehog shoes and be booted in record time but if not, try connecting a display and see what it says, the error messages are usually quite straightforward!
Updating the bootloader/eeprom
Running the latest version of the bootloader/eeprom is generally recommended, though there are 2 different versions to look at. Simply running rpi-eeprom-update will show you the version that you’re on and the latest available version on the stable release (it’s stable by default, you can use raspi-config to change that if you wish to live on the edge).

To update the Raspberry Pi bootloader/eeprom:
sudo rpi-eeprom-update -a
sudo reboot
If for whatever reason you wish to cancel an update, use sudo rpi-eeprom-update -r.
Once you’ve rebooted, you can run rpi-eeprom-update again to see the current version. If you need an in-depth, longer guide on how to update the Raspberry Pi 5 bootloader, we have you covered!
2 comments
Please remind folks there is a problem with Phison Controllers on NVME cards (I think Pimoroni has a list of known good cards). For myself, what I have is preventing g being able to boot, but for some reason, it still works as mass storage.
Good point. I’ll add a note tomorrow, thanks!